Category Archives: laptop keyboard

Clean Your Sticky Laptop Keyboard

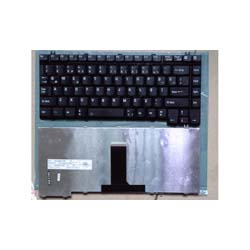
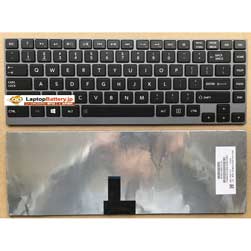
So your TOSHIBA Satellite M70  Keyboard  keys stick for one reason or another. Perhaps you spilled a drink on it, or you just like to eat and surf the web at the same time.

I had the misfortune of spilling some Mountain Dew on my keyboard about two years ago, and this method has kept my keys working smoothly ever since. Cleaning your laptop is simple, but time consuming. Take your time and do not try to force anything and you should have a perfectly functioning keyboard once more!

For any sticky situation, following these steps will make your keyboard work and feel like new!

Step 1: Shut Down … Fast!

If you just spilled something on your TOSHIBA Satellite M70  Keyboard, shut your computer down as fast as possible!

Your first order of business is to shut down your computer and remove the battery -.. As quickly as possible if you spilled liquid on it Force shut down your computer by holding the power button until it turns off Any data loss during this process should be minimal and less costly than any shorted-out hardware.

Step 2: Gather Materials

To give your laptop a thorough cleaning, you will need:

- A cup or container large enough to hold all the keys on your keyboard

- Rubbing alcohol

- Cotton swabs (Q-Tips)

- Dish soap (without bleach) or some other mild detergent

- Paper towels

- Flathead screwdriver

- Towel

Most of these supplies are probably already sitting around your house or apartment, but I doubt you’ll spend over $ 10 if for some reason you need to purchase everything.

Step 3: Initial Wipedown

Soak up as much of any spilled liquid as you can with a paper towel or rag. Make sure to get all surfaces of your computer, including the screen.

It’s quite possible that you splashed liquid into every deep dark crevice of your computer during your spill. Use your cotton swabs if necessary, but do not worry about getting in between the keys, we’ll get to that soon.

Step 4: Remove Keys

Alternatively you can draw the layout or use a friend or family member’s computer as a reference. The layout of certain keys can differ slightly among computer brands and models.

Your keys were basically snapped onto your TOSHIBA Satellite M70  Keyboard at the factory … and therefore can be unsnapped.

Grab onto a corner of a key and firmly lift up. You may be required to pry on more than one corner at a time to unsnap each key. If a key (especially larger ones) prove difficult, wiggle a flathead screwdriver underneath the key and rotate the blade in several places to “persuade” it to let go.

If you spilled liquid on your keyboard, it will probably be necessary to remove the key carriers as well. My carriers are white and rotate to allow the keys to move up and down. These snap off similar to the keys, but yours may differ slightly .

This process will take some time, be patient and do not rush this part … that’s a sure way to break something important.

Step 5: Clean Keys

The next step is to give your keys a soak in some dish soap (or other mild detergent) and warm water. Fill your cup or container and drop in your keys.

I let my keys soak for about an hour.

Some of your larger keys may have one or several metal guide bars on their underside. These bars slide into slots on your TOSHIBA Satellite M70  Keyboard, so make sure not to bend the bars or their slots on your computer.

Step 6: Clean Keyboard

As you can see, I did not remove every key on my computer since only a few of them were sticking.

Dip your cotton swab into the rubbing alcohol and begin to clean around each key post. Remember if any liquid made its way under your keys to remove the key carriers as well and soak them with the keys.

I found that some areas of the keyboard chewed up the cotton swabs fairly quickly. If this happens, remember to remove any cotton snagged off the swab before replacing your keys.

Flip your computer upside-down on a towel and give it about an hour to completely dry. If you are cleaning up from a liquid spill, let it dry at least overnight in case any liquid made it past your keyboard and into your computer case.

Step 7: Clean Keys … Again

Once your keys are done soaking, lay them out and pat them down with a paper towel or clean rag. Allow them time to completely dry, usually an hour or two.

Although it may not be necessary, I recommend going over the backs of your keys and your key carriers with rubbing alcohol the same way you cleaned your TOSHIBA Satellite M70  Keyboard. Remove any guide bars and clean under these as well. Replace the guide bars when you are finished .

Step 8: Reattach Everything

You’re almost done!

After allowing time four your computer and keys to completely dry, reattach everything in reverse order that you removed it. Key carriers, keys, and battery. Test each key for function after you attach it. If a key still appears to stick a little, repeat steps 5-7 as needed.

Refer to the picture or drawing you made in step 4 when reattaching your keys. The keys and carriers just snap back into place, but make sure everything is aligned before applying any real pressure. Again, take your time and do not rush this part , you can still snap part of a key or try to force a key into the wrong place.

Boot up your computer and test out your keys on a word processing program. Make sure the letter you press on your TOSHIBA Satellite M70  Keyboard is what shows up on your screen, it’s very easy to switch two keys even if you were paying very close attention to their placement .

Step 9: Done!

Now you’re done! Enjoy your revitalized keyboard!

If for any reason a key starts to stick again, repeat this process until it functions smoothly.

Thanks for looking.

Laptop Keyboard for TOSHIBA Satellite M70

How to Repair Dell Laptop Keyboard Keys

Knowing how to repair Dell Vostro V130 Keyboard keys is a handy trick because laptop keys frequently suffer from damage due to harsh use or spills. Liquid spills can cause internal damage that is much worse, but if the problem is only with the keyboard then it is easier to fix. There are different ways to fix your keyboard depending on what type of damage has occurred.

Method 1 of 3: If the Key Cap and Key Retainer Have Fallen Off the Keyboard

1.Purchase the missing cap or retainer if you have lost them.

2.Unsnap the cap from another key that is in working condition but leave the retainer connected.

3.Take a close look at the 4 connecting points on the working retainer and compare it to the area where the damaged key used to be.

4.Place the disconnected retainer the same way that you see the working retainer.

5.Put the missing cap on top of the retainer so the letter on it reads correctly and snap it back in place.

Method 2 of 3: If the Space Bar Has Fallen Off the Dell Vostro V130 Keyboard

1.Use a flathead screwdriver to separate the retainer from the space bar key.

2.Link the retainer with the hooks on the keyboard to return it to its proper place.

3.Put the space bar key on top of the retainer and snap it in place.

Method 3 of 3: If You Want to Use Another Key to Replace the One That is Lost

1.Choose a key that you rarely use such as the “Scroll Lock” or one of the “Alt” keys.

2.Pull on the key gently to remove it from its original place.

3.Remove the retainer but make sure that the 2 pieces on the back are still connected.

4.Use a sharp object to lift the membrane that was just under the key before you removed it.

5.Apply strong glue at the bottom edge of the membrane.

6.Place the membrane so that the glue sticks to the new area where you want the key to go.

7.Add the key retainer above the membrane.

8.Put the Dell Vostro V130 Keyboard  key cap above the retainer and give it a gentle push to snap it in place.

Tips

1.If you have many keys missing you may want to consider buying and installing an entirely new Dell keyboard. Make sure that you buy a keyboard that matches the exact make and model of your laptop.

2.Get your laptop repaired by the retailer or manufacturer if it is still under warranty with coverage for keyboard damage.

3.If a key does not snap in place, turn it upside down and inspect the locking clips. A damaged locking clip will prevent a key from snapping in place in which case you will need to use another key.

4.Choosing the best method to repair Dell laptop keyboard keys depends on the style and model of your laptop. Gather information about your particular laptop to decide which method is best for you.

Laptop Keyboard for Dell Vostro V130

Clean a Laptop Keyboard step by step

Laptop keyboards take in a lot of dirt, dust and grime. Occasionally cleaning the Dell Inspiron 1764 Keyboard will make your laptop look nicer and preserve its life.

1.Start by turning your machine off. Unplug it, disconnect it and remove any USB wires or memory sticks.

2.For simple cleaning, tilt your laptop forward. Bang the back and hopefully anything lodged between the keys will fall out!

3.Take the end of a teaspoon and wrap it in a wet-wipe. Drag the tea spoon along all the edges of the keys and keyboard. This will pick up any dust and dirt.

4.Take a vacuum cleaner and run it over the keys. This will rid your laptop of any more dirt. Alternatively, you can use a hair-dryer to blow it away but ensure you repeat step 2.

5.If you are still having problems, remove your laptop keys. So far, we have avoided doing this because it is timely, annoying and easy to get wrong.

Research your laptops brand name and see if you do have keys that can actually be taken off

Be carful, because the keys are often held on by fragile plastic tabs. Gently pop them off and store them somewhere safe.

Run your wet-wipes over the bare Dell Inspiron 1764 Keyboard. Q-tips also work well with this, after soaking them in anything that evaporates (rubbing alcohol and hydrogen peroxide) so that you do not get moisture under the keyboard.

Pop the keys back on. There will occasionally be keys with metal “stands” on the back – these are easy to slide back into their rails. Other keys will simply require you to depress the corners.

You can also wash the keys, but this makes losing keys easier.

6.Finished.

Laptop Keyboard for Dell Inspiron 1764

How to Pop a Key Back Onto a TOSHIBA Laptop Keyboard

It’s all too easy to pop the keys off a laptop, and almost impossible to get them back on without losing or destroying the nearly microscopic parts. If you’re careful and proceed with caution, then you can pop a key back onto your TOSHIBA Satellite U400 Keyboard and make it work as good as new. All you need is a careful eye and some very stable hands.

1.Start with all the pieces. Examine them carefully. Note where the tiny tabs are on them. Arrange them correctly.

2.Note the orientations of the tabs on the U-shaped piece. Slip the tabs under the metal loops on the laptop.

3.Slip the second O-shaped piece through the centre of the U-piece.

4.Hook the tabs on the O-piece under the hooks on the laptop.

5.Click the tabs in the O-piece into the notches in the U-piece.

6.Make sure the tabs are raised. At this point, the two pieces are gently locked together. If done correctly, they will not sit flat. They will be raised slightly above the laptop surface.

7.Place the key right-side up over the U and O pieces. So first click the right side (you’ll hear it click!), And then push down the left side of the key.

8.Click it into place.

9.Voila! The key is replaced.

Laptop Keyboard for TOSHIBA Satellite U400

Laptop Keyboard No longer working

Laptop keyboards are aa bit more delicate than keyboards found in desktop computers. Hence they face more problems. Normally, they’re replaced when they render defective. However, these keyboard issues can be looked after as well as prevented by regular cleaning. Common issues like, keys no longer working in your keyboard, the need to press keys firmly to have the output or any keyboard typing issues, may be easily handled in your house.

Problem # 1 – My TOSHIBA Portege R700 Laptop Keyboard Keys are certainly not Working

Sometimes you may find certain keys of this laptop’s keyboard to never be working properly. You type those keys however, there is no output on the watch’s screen or else you have to press these keys firmly to secure a result. You face this matter in the event you accidentally spill any liquid substance on your keyboard, or caused by dust accumulating on the medial side the keys, pressing certain keys hard while winning contests or even because of lack of lubrication. Therefore that you are supposed to keep your laptop’s keyboard by cleaning and lubricating it regularly.

Troubleshooting Steps

1, First, take out each key. Start using a small screwdriver to carefully pry each key by looking into making it loose. Because they become loose, keys will simply pop off. Also, remove the rubber piece present under every key. Maintain your keys and rubber pieces in different containers.

2, When you have removed all keys in the TOSHIBA Portege R700 Laptop Keyboard, you will have to clean the keyboard from inside. Use cotton swabs or ear bubs and slightly dip them in water. Avoid providing them with too moist, as excess water can harm the keyboard. Meticulously clean the entire keyboard using moist cotton swabs, laying extra emphasis on key spaces.

3, Now, start cleaning keys this is earlier removed and kept in the container. Use foam rubber and lighting fluid to clean each key alone. This helps in removing any sticky substance present on keys. Apply any household cleaner on these keys and let them stay for around quarter-hour. Then, wash the many keys properly using domestic hot water and allow the keys dry completely.

4, The small rubber pieces you took out earlier and trapped in the container ought to be thoroughly rinsed in warm water, when you have sprayed a family group cleaner to them. Soak these rubber pieces up in paper napkins so they really dry quickly.

5, To lubricate the keys, place all keys (facing top-down) on the flat surface. Apply mild lubricant from all sides, on all keys as well as leaving the crooks to dry. Avoid applying an excessive amount lubricant instead invest in a light coat.

6, Just like way you lubricated the keys, apply mild lubricant around the keyboard surface and let it dry.

7, Upon having cleaned and lubricated all of the parts, carefully reassemble laptop keyboards. Focus on placing all rubber components for the TOSHIBA Portege R700 Laptop Keyboard. Next, fix all keys of their respective positions cautiously securing the wire of these keys. Takes place finger and depress all keys, one after the other, firmly so that they fit properly inside the slots. That is it.

The whole process will need that you simply more 2 hours. Cleaning and lubricating the laptop keyboard inside above prescribed manner one per year, can prevent many such situations.

Problem # 2 – My Laptop’s Keyboard Types Wrong Characters

Bankruptcy lawyer las vegas keyboard types wrong characters, this is due to of an software problem instead of a hardware one. In case you accidentally press specific keys in your keyboard, it might activate a certain function in charge of the situation.

Troubleshooting Steps

1, Simply select the user interface option

2, Click on → ‘Regional and Language Services’ → ‘Languages’ → ‘Details’ → ‘Key Settings’

3, Find the option ‘Switch Between Input Languages’ and then click on ‘Change Key Sequence’

4, Guarantee that the many check boxes within the window are unchecked and repeat the identical for ‘Plunge to ….. (Keyboard Type)’

5, Click → ‘Ok’ → ‘Ok’ → ‘Apply’ → ‘Ok’.

Problem # 3 – My Laptop’s Keyboard Types Numbers As an alternative to Letters

That is different problems due to some hardware issue. It is also possible you might have enabled a digital lock unknowingly.

Troubleshooting Steps

Pressing the ‘Function’ key along with the ‘Num lock’ key (Fn + Numlock) or press the ‘Function’ Key combined with the ‘Shift’ and ‘Num Lock’ key (Fn + Shift + NumLock). This will likely disable the lock and consequently solve your complaint.

It was all about solving your TOSHIBA Portege R700 Laptop Keyboard conditions that you can test out yourself. After trying each of the above given options, if you still discover the keyboard still not working, you will have to take your laptop to some service center to have it repaired .

Laptop Keyboard for TOSHIBA Portege R700

How to Remove the Laptop Keyboard

Removing the TOSHIBA Satellite U400 Laptop Keyboard of a laptop is necessary if it is old or broken. The removal of the keyboard is also done for other fixture purposes. There are essential procedures to follow in the removal of the laptop’s keyboard. These procedures are necessary to avoid damaging the laptop during the process. There are also different kinds and models of laptops. Different laptop manufacturers have different ways of placing the keyboard on the system board. These methods of removing the keyboard may not be applicable or somehow different to other brands of laptops.

Materials Needed:

- Laptop

- Flat head screwdriver

- Phillips head screwdriver

Step 1

Turn off the laptop if it is running. Removing the TOSHIBA Satellite U400 Laptop Keyboard while the laptop is running may cause accidents.

Step 2

Determine the location of the keyboard cover. This is a plate for covering the screws of the keyboard. The keyboard cover usually contains LED lights indicating if the laptop is running or charging. It is commonly located on the top of the keyboard and just below the monitor.

Step 3

You can remove the cover by using a flathead screwdriver. Place the screwdriver in the right slot. Use the screwdriver as a lever to pull up the keyboard cover. There may be cases when the cover is attached to the hinge cover. There are screws attaching the TOSHIBA Satellite U400 Laptop Keyboard cover to the hinge cover. Unfasten each screw at the back of the computer. Do this before pulling up the cover with the use of flathead screwdriver.

Step 4

The screws holding the keyboard on the holding board will be visible after removing the cover. There may be 3 to 4 screws holding the keyboard in place. Carefully remove each screw using the screwdriver. Place these screws into different containers assigned for each of the screw slot. This is because sometimes, the screws are different in size from one another.

Step 5

Gently lift the keyboard in the direction of the laptop screen. This is to view all the wires and cable connected to the TOSHIBA Satellite U400 Laptop Keyboard and the system board.

Step 6

Properly remove the data cable from the motherboard. Do this by gently pulling on the cable plug in a vertical direction.

Step 7

Look for other wires attaching the keyboard to the laptop after removing the data cable. Remove these other wires properly from the system board.

Step 8

Lift the TOSHIBA Satellite U400 Laptop Keyboard from the laptop completely. Make sure there are no wires connecting the keyboard and the system board before completely removing the keyboard.

Laptop Keyboard for TOSHIBA Satellite U400

Guide to choose a good laptop keyboard

laptop keyboard is a very important part of the laptop system. It allows you to communicate with the notebook. Without a keyboard, even a laptop with the best configuration is also equivalent to a useless piece of metal.

Many people just focus on spending their cash on the hardware inside the laptop and then just buy the cheapest Keyboard they can find, this is ok if you do not use your laptop much but if you are on it for long periods you may wish to purchase a higher quality Keyboard, and if you run lots of programs you may want a Keyboard with one click button functions, this saves and lot of time and makes it more efficient.

HP 1700 Laptop Keyboard  like anything else can range in price, the more expensive are usually better depending on what you need, ie a more expensive Keyboard might have more features such as buttons to click on the keyboard, one click and your on the internet, one click and your checking your emails, some even allow you to program the buttons yourself.

Different layouts for the HP 1700 Laptop Keyboard are available depending on varied needs of people. These needs may vary depending on the language of people or the purpose for which the keyboard is being used. The best alternative layout for the keyboard is the Dvorak Simplified Keyboard. However, this layout is not in widespread use.

For gaming purpose, it is advisable to get a gaming keyboard. The thing to look out for is the in-game control and hot keys programmability. A good gaming keyboard such as Logitech G15 Gaming Keyboard allows you to have a lot of control over the gaming execution. It has 18 keys for hot keys programming and also comes with a LCD display to give you a clearer view of the game information.

Frequent multimedia user can also benefit from the various types of multimedia keyboard available in the market. These keyboards have extra shortcut keys to give you full control of your favorite media player or video playback. Logitech Media Keyboard has a full range of multimedia shortcut keys that gives you convenient access to your entire favorite player. I am quite surprised that a keyboard with so many functions is only as cheap as a simple keyboard.

Choosing a HP 1700 Laptop Keyboard is actually a very fun thing. Take your time to go through the various keyboards and you will be able to find the one most suitable for you in no time.

Laptop Keyboard for HP 1700

Dry out your keyboard on your laptop without damaging your laptop

Accidentally spilling liquid on your  HP 210-1015TU PC WF621PA Laptop Keyboard  can happen to anyone. Yes, that dreaded spill on your keyboard! Your first reaction may be, ‘Oh no! I have to buy a whole new keyboard or even worse, a new Laptop!’ However, all is not lost. Before going to that last resort, try out the following steps.

1.Immediately unplug your computer from the electricity supply or turn off your Laptop.

Remove all external hardware. Remove the laptop’s battery and place it in a static-free bag.

2.Turn your  HP 210-1015TU PC WF621PA Laptop Keyboard or the whole Laptop upside down.

3.Take note of your keyboard layout (take a photo with your Mobile or draw a layout).

4.Insulate yourself to prevent Static Electric Discharge (SED).

Avoid being on a rug or carpet; there is greater risk of being subject to static electricity Use an insulator wrist band or glove to prevent any SED..

5.Use a normal hair dryer and set it on COOL air setting or a fan to blow air inside the keyboard area.

6.If the liquid spilled is soda, tea or any sticky liquid, please follow these steps:

Remove all wet keys (pry them up using a flat-head screwdriver).

Use a cotton swab and a detergent cleanser for those sticky keys. (Cleansers are available in most electronics stores).

You may have to dismantle the Laptop case if you can not remove all the liquid. Thoroughly rinse the removed keys, let them dry for at least 2-5 hours, depending on your atmospheric temperature and humidity.

Follow your keyboard photo or drawn layout, push each key back in place. Do not use force, the keys should snap into place by a light nudge.


Tips, Tricks & Warnings

1.You should start the drying out actions immediately. Time is of essence. If dried, on time, damage will be minimum.

2.If you are unable to boot your Laptop after re-assembling your  HP 210-1015TU PC WF621PA Laptop Keyboard keys, you should seek help from an authorized IT workshop.

3.Be sure that your keyboard is thoroughly dry before you re-assemble it.

4.Never use heat to dry out your computer keyboard or Laptop.

5.There is a virtual on-screen keyboard at Control Panel> Ease of Access> Ease of Access Center, On-screen Keyboard that can be used if you have a few non-functioning keys after your computer is re-assembled, just until you can replace your keyboard.

Questions and Answers

The minimum time for laptop to dry is about an hour, but it is strongly suggested that you leave it to dry completely for 24 hours. Be sure too not to remove its case so the warranty will not get voided.

Laptop Keyboard for HP 210-1015TU PC WF621PA

How to Replace Your IBM ThinkPad R61 Laptop Keyboard

If your laptop keys are sticky, or some of them are missing, or the keyboard isn’t working at all, you can usually replace the entire keyboard yourself for between $ 20 and $ 60. The operation isn’t as hard as you might think, and performing it has the advantage that you don’t have to remove and replace each key individually. Though every laptop is different, removing your laptop’s keyboard usually involves simply unsnapping a cover, removing a few screws, and disconnecting a cable.
If you’re up to the challenge, you can tackle this project in the comfort of your own home Take care, though:. A working laptop is a terrible thing to waste, and PCWorld accepts no responsibility for any damage to your machine that might occur if you try to take it apart Furthermore, if duplicating our process requires actually opening your entire laptop -. if, say, you have to remove anything more than a handful of screws -. you should call a professional And finally, before you do anything else, check to see whether the laptop is still under warranty. If it is, you may be able to get it replaced for free.

Find a Replacement IBM ThinkPad R61 Laptop Keyboard
The first step of the replacement process is to obtain the right keyboard for your laptop. Compare prices by checking eBay, Google, and online stores that specialize in replacement hardware, such as LaptopKeyboard.com, Spare Parts Warehouse, and LaptopsKeyboard.com. Make sure that the keyboard you buy is for your laptop’s exact model number, which you may find printed on your screen bezel or on a label attached to the underside of the laptop. You can simplify your search further by specifying the keyboard’s part number, which you may be able to find on the laptop manufacturer’s website or by calling their support / service department.

Laptop Keyboard for IBM ThinkPad R61Laptop Keyboard for IBM ThinkPad R61

Replacing the IBM ThinkPad R61 Laptop Keyboard
For more-precise instructions on how to replace your particular laptop keyboard than the general steps provided here, check online. There’s a small chance that your laptop is unique and has a very different replacement process from the standard one outlined here. Check with your laptop manufacturer and with the site where you bought the replacement keyboard to see whether they offer specific instructions for DIY repair Some manufacturers provide service manuals with detailed instructions on a variety of servicing tasks;. if not, try searching the Web for “how to replace keyboard “with your laptop’s model number.

! Now let’s get started Confirm that you purchased the appropriate replacement, by placing the new one on the laptop, and seeing if it appears to be the right shape and size Next, gather your tools:. A small Phillips screwdriver for removing the small screws , and a butter knife or other small, thin, flat tool for prying off any covers.

Make sure that the laptop is powered completely off: Unplug the power cord and take the battery out.
Examine the cover / trim piece that sits between the keyboard and the screen;.. It usually affords access to the keyboard Check for and remove any screws that appear to be helping hold the cover piece on Some pieces also cover the screen hinges, which may have small screws on their backs.

Before removing the cover, be aware that it may have a data cable on the back that’s connected to the laptop. This cable is important and usually doesn’t have much slack, so be very cautious when removing the trim piece that holds your laptop’s keyboard in place. You don’t want to rip the cable from the laptop and ruin the connector or the cable.
When the cover is loose, gently remove the cover / trim piece with your bare hands; if necessary, carefully use a butter knife or other thin flat tool to pry it up The cover should snap off fairly easily with a small amount of force-. -don’t use extreme force or you may break it If it doesn’t seem to be coming off, recheck for any remaining screws that may be holding it on -. even underneath the laptop – and remove them.

Once you’ve removed the cover / trim piece, set it aside. If it’s attached to the laptop via a data cable, carefully try to move it out of the way without damaging the cable. Then find and remove the screws holding the keyboard in place; there are usually two to five such screws, located along the top of the keyboard.
Before pulling the IBM ThinkPad R61 Laptop Keyboard up, note that the back of the keyboard attaches to a data cable that in turn is connected to the laptop. This cable usually doesn’t have much slack either, so be very careful when pulling it up. It is crucial to avoid ripping the cable from the laptop and ruining the connector.
Carefully pull the keyboard up (without ripping the data cable from the laptop) and unlatch the data cable connector, usually by flipping up the small latch on the connector. Next, remove the data cable and set the old keyboard aside.

Pick up your new keyboard, align it (without setting it down), and attach the data cable to the connector on the laptop, usually by inserting the flat cable as far as it will go and then flipping the small latch on the connector back down to grasp it. With the data cable connected, set the keyboard in place, being careful not to pull at or damage the cable in any way. Reinsert the screws to hold the keyboard down and reattach the cover / trim piece, which usually requires a little force to snap back into place. If you removed any screws from the cover earlier, reinsert those as well.

Once you’re done with these steps, you can reinstall your battery and boot up the laptop. If everything went smoothly, you should have a perfectly working keyboard at a fraction of the cost of having a professional repair service do the work!

CPU in the computer will generate heat during operation how to do

CPU in the computer will generate heat during operation , if not the heat , with the heat accumulation caused by burn CPU. So you need to configure the cpu fan heat fan, fan to speed up air flow through the heat timely dissemination . Cpu fan and heat sensor, when the temperature reaches a set region , by adjusting the fan speed sensor , so that the CPU temperature is maintained at a reasonable range.

How much cpu speed normal ?

Because there is a heat sensor cpu above , at different temperatures so cpu speed it is not the same , the general cpu temperature is normal, the speed at 2000-2500 rpm / min or so, there are a number of high-profile users to play games , so cpu temperature on will increase , which could reach beyond the scope of your cpu above 60 degrees Celsius , the same cpu fan will reach 5000 rpm / min. However, in this case the fan is also considered normal. So the specific values ​​of the fan speed is not an accurate value , it is mainly based on the needs of the environment and the user have a great relationship .

Secondly cpu temperature is also associated with voltage . Why? Because the cpu temperature is the heat with the computer power is to measure the size , power and decided to have a relationship with the size of the voltage , if the computer is too low, the heat is small, but when the computer overclocking when the voltage is too small unknown fault occurs . If the voltage is too high, excessive heat , so that the cpu temperature is too high, it will seriously burned to the cpu phenomenon. So we are very difficult to control the voltage , set high, word within the radiator , set low , CPU word within easy BSOD and other unknown fault . But normal circumstances we do not need to worry about the relationship between temperature and voltage cpu , in normal circumstances, the impact is small.

cpu fan speed is not normal how to do ( Editor’s Choice : cpu fan speed is slow how to solve ) ?

cpu fan speed is not normal, then certainly with the cpu temperature is not off the relationship . When the cpu is too high so , cpu speed will reach a very high speed, so we found the bios set by the cpu speed exceeds a certain value, resulting in cpu speed is not normal. But in general the cpu speed of 5000RPM is normal , if your speed range , then here is a little effect.